
Bottom-connected radiator – components
Bottom-connected radiator – components
A bottom-connected radiator has the valve integrated directly in the radiator; to connect it to the pipework, however, you need to add a head, a bottom connection fitting and pipe fittings. The diagram shows all the components you add to it. Click a number to open the matching product.
A number in the diagram takes you to the matching item in the list below.
Step 1: radiator connection


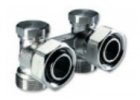
Step 2: pipework and connections
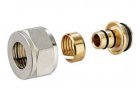


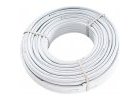
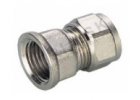
Step 3: temperature control


Connecting a radiator with bottom connections
Radiators with bottom connections are in demand mainly in new builds, where the pipes come out of the floor or out of the wall just above it and the installation should look as clean as possible. The set is intended for heating engineers who need to combine the bottom connection fitting, adapters, pipe and head correctly. The valve insert is already built into this type of radiator, but all the parts between the radiator and the pipework are missing.
Installation procedure
- Before plastering and laying floors, use the radiator's technical data sheet to determine the exact position of the connections – their centre distance and distance from the wall. A bottom connection does not forgive a mistake in the position of the pipes.
- Bring the pipes out of the wall or floor at a centre distance that matches the connection fitting (usually 50 mm for standard radiators). Protect the pipe ends from dirt until the radiator is installed.
- Find out which radiator connection is the flow. This is determined by the manufacturer, and if they are swapped, the integrated valve does not work correctly.
- If the radiator has connections with a female thread, screw an adapter into them, to which the fitting is then connected.
- Fit a straight or angled connection fitting on the connections, depending on whether the pipes come out of the floor or out of the wall.
- Connect the pipe with a eurocone compression fitting that matches the type and size of the pipe.
- With a fitting designed for both one-pipe and two-pipe systems, check that it is set for the type of system in which it will operate.
- Fill the system, bleed it and carry out a pressure test. Preset the integrated valve according to the calculation and fit the head.
Choosing the right parts
Straight or angled fitting. If the pipes come out of the floor, use the straight version. For pipes brought out of the wall, the right choice is an angled fitting, which turns the direction by 90°.
A fitting with shut-off valves allows the radiator to be shut off, removed and drained without affecting the rest of the system. When decorating or replacing the radiator, this saves a considerable amount of work.
Connection threads. Radiators are made either with a male thread for a eurocone or with a female thread. With a female thread, you need an adapter that creates the connection for the fitting.
Pipe and compression fitting. Multilayer PEX-AL-PEX pipe, PE-Xa pipe or the HEPWORTH polybutylene system is used for the connection. The compression fitting must be designed precisely for the selected pipe type and size.
Head. Check the connection thread of the integrated valve insert. Most radiators use an M30 × 1.5 thread; with other inserts, you need a head with the appropriate adapter.
Most common installation mistakes
- Incorrect centre distance or distance of the connections from the wall – the fitting then cannot be seated without stress.
- Flow and return swapped on the radiator.
- A fitting set for a different type of system than the one it operates in.
- A fitting tightened at an angle, so the eurocone joint leaks.
- Unflushed pipework – dirt clogs the integrated valve insert.
Commissioning and maintenance
After filling the system, bleed each radiator, check the joints for leaks at operating temperature and set the presetting of the valve inserts. When replacing or removing the radiator later, simply close both shut-off valves of the fitting and drain the radiator. Outside the season, leave the heads fully open.
Frequently asked questions
Is a separate thermostatic valve needed with a bottom connection?
No. The valve insert is part of the radiator, so a connection fitting and a thermostatic head are all you need.
Can the radiator be removed without draining the system?
Yes, if it is connected with a fitting that has shut-off valves. Once they are closed, you drain only the radiator itself.
What if the pipes come out of the wall rather than the floor?
In that case, use an angled connection fitting. Bring the pipes out of the wall at a height and centre distance that allow the fitting to be connected without bending the pipes.
Does a radiator with bottom connections have a lower output?
No. The internal distribution pipe carries the water to the upper part of the radiator, so with correct connection and sufficient flow it achieves the output stated by the manufacturer.
What to order for the radiator
Under the radiator, prepare the Vekoluxivar one/two-pipe - straight, EK x 3/4" F or the Vekoluxivar one/two-pipe - angled, EK x 3/4" F, for a female thread the Vekolux adapter 3/4" x 1/2", and for the pipe a compression fitting for alpex multilayer pipe. Registered partners can see wholesale prices after logging in. We dispatch goods from our warehouse in Žilina and ship them throughout the EU.