
Side-connected radiator – components
Side-connected radiator – components
A standard-output radiator comes with a wall-mounting kit, but the head, valves and fittings are never included. The diagram shows all the components you add to it. Click a number to open the matching product.
A number in the diagram takes you to the matching item in the list below.
Step 1: radiator connection


Step 2: pipework and connections


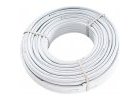
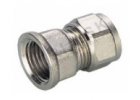
Step 3: temperature control


Connecting a radiator with side connections
A panel or sectional radiator with side connections is still the most widespread heat emitter in both renovations and new builds. The set is for heating engineers who need to quickly put together a valve, a lockshield, an adapter to the pipe and a head for each radiator so that all the parts fit together precisely. Resellers can also use the overview when completing an order for a customer.
Installation procedure
- Hang the radiator level on its brackets, at a distance from the floor and the windowsill that allows air to flow freely beneath and above it.
- Determine the connection method. The flow goes to the upper connection, the return leaves from the lower one. For longer radiators, a diagonal connection is advantageous – flow at the top on one side, return at the bottom on the other.
- Screw a thermostatic valve in the angled or straight version into the upper connection. Observe the flow direction marked by the arrow on the valve body.
- Fit a lockshield valve in the lower connection.
- Close any unused connections with a blanking plug and an air vent, if these are not supplied with the radiator.
- Cut the pipe square, calibrate it and chamfer the inner edge. Fit a eurocone compression fitting on the end of the pipe and tighten it into the valve with appropriate force.
- Fill the system, bleed it and carry out a pressure test.
- Preset the valve according to the hydraulic calculation and fit the thermostatic head.
Choosing the right parts
An angled or straight valve should be chosen according to the direction from which the pipe approaches the radiator, and also so that the thermostatic head points horizontally once fitted. In a vertical position above the valve, it would be affected by the heat rising from the radiator and the pipe.
A dual-regulating valve combines thermostatic control with flow presetting. This allows you to balance the system directly at the valves, and distant radiators receive enough water.
The lockshield valve on the return allows the radiator to be shut off and disconnected without draining the system. Choose the angled or straight version in the same way as for the valve.
The pipe should be chosen according to the installation method. Multilayer PEX-AL-PEX holds its shape and has low thermal expansion, PE-Xa is more flexible and is also suitable for floors, and the HEPWORTH polybutylene system is assembled by push-fit. Each type requires its own fittings – the compression fitting must match both the type and the size of the pipe.
The thermostatic head must have the same connection thread as the valve, most often M30 × 1.5. A liquid-filled head responds to temperature changes quickly and evenly.
Most common installation mistakes
- Flow and return swapped – the valve works against the flow direction and may whistle or knock.
- A compression fitting on uncalibrated pipe or with a damaged O-ring.
- Hemp or tape on a eurocone joint. The joint is sealed by the cone and the O-ring; excess sealant will damage it instead.
- Head positioned vertically above the valve or covered by a curtain or a radiator cover.
- An unbalanced system in which distant radiators are lukewarm and nearby ones overheat.
- A combination of parts from different systems that do not fit together dimensionally.
Commissioning and maintenance
Fill the system slowly and bleed the radiators one by one, from the lowest storey upwards. Once the system has warmed up, check all the joints for leaks and set the valve presettings. Fit the head in the fully open position. Outside the heating season, leave the heads open so that the valve plug does not seize.
Frequently asked questions
Does every radiator need a lockshield valve?
Yes. Without it, the radiator cannot be disconnected or balanced, and any modification would require draining the whole system.
Can I use a head from a different manufacturer than the valve?
In most cases, yes, provided it has the same connection thread and matches the valve stroke. For less common valves, check compatibility in the manufacturer's documentation.
Which pipe is best for connecting radiators?
For surface runs and pipework in walls, multilayer pipe that holds its shape is practical. For runs in the floor, PE-Xa is also a good choice. Installation without press tools is the domain of push-fit systems.
Why does the valve whistle after the head closes?
The most common cause is an excessive pressure difference across the valve or a reversed flow direction. Balancing the system, a correctly set pump and checking the connections will help.
What to order for the radiator
For each radiator, prepare the Thermostatic dual-regulating valve - angled, 1/2" x EK, the Lockshield valve - angled, EK x 1/2" and the Liquid-filled thermostatic head - M30x1.5; white; make the pipework from the PEX-AL-PEX 16 x 2 pipe for heating, underfloor heating and water range. Registered partners can see wholesale prices after logging in. We dispatch goods from our warehouse in Žilina and ship them throughout the EU.